Features of highlighting
The classic version involves the technique of highlighting hair on foil. Later, open methods of dyeing were invented, and sometimes hairdressers separate the treated strands with transparent cling film. All these variations exist for a reason.
The use of foil has both pros and cons. But, nevertheless, it is successfully used in various types of coloring to this day.

Why foil
Many are surprised when they first see how foil is used in coloring. Those who have at least once carefully read the instructions for resistant paints or lightening compositions, probably paid attention to the line: "Avoid contact with metal." And here the processed strands are wrapped in it.
In fact, the food grade foil used for highlighting is a very thinly rolled aluminum sheet.
On contact in air, aluminum is covered with a resistant oxide film, which is inert to other compounds. Therefore, he does not take part in the ongoing chemical reaction, due to which the hair is colored.
But aluminum perfectly retains heat, being a kind of catalyst that accelerates the flow of chemical processes. Odor does not pass through the foil (so you do not have to constantly breathe in harmful ammonia fumes), and paint does not leak.
It is very flexible and allows you to fix a strand on the head without additional clamps. So the use of foil for hair dyeing is effective and logical.
Pros and cons
Few people know that the highlighting technique appeared thanks to the hairdresser Jacques Dessange, the owner of a network of beauty salons. Girls with golden ends of strands in their hair regularly came to him. As an explanation, they reported that they were on vacation in southern countries, and this effect was obtained from exposure to bright sunlight. This phenomenon inspired Dessange, and he decided to create similar hairstyles artificially using hair dye and oxygen.
He is also responsible for the development and creation of a rubber cap for highlighting individual curls and a modern device for creating curly Babyliss curls.

When using the technique of highlighting on foil, be sure to read the information indicated on the packaging of the colorant. In the same place, in large letters, information will be indicated prohibiting the contact of metal objects with paint. After reading the instructions, a lot of questions and doubts may arise.
But do not worry and give up trying to transform your image. There is no reason to panic, the foil used at the very first contact with air is covered with an invisible ionic network, which creates obstacles for any chemical reactions.
The technique of highlighting on foil has many advantages.
- Fast painting. After applying the coloring composition, the used foil is tightly closed, respectively, natural heat is retained inside, due to which chemical processes are accelerated.
- No smell. Any paint has some unpleasant odors, and the tightly sealed foil does not let them through.
- Convenience of separating and fixing hair. Due to its metallic structure, the foil is convenient to use when dyeing long strands. After applying the paint, the metal sheet is wrapped and fixed without the use of various hairpins, clips and clothespins.
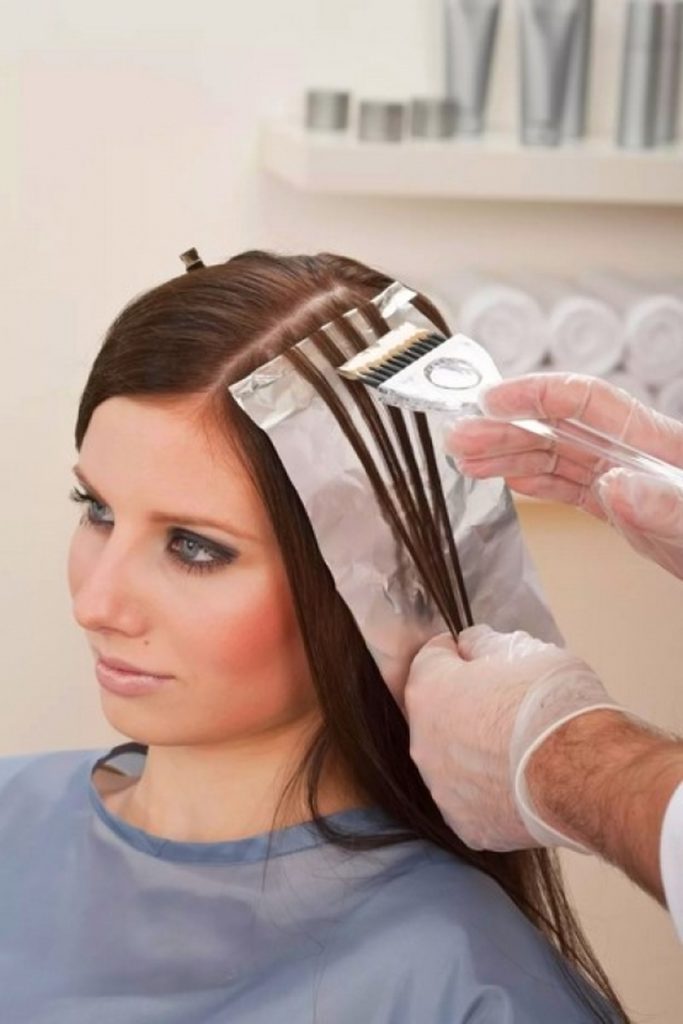
Along with the advantages of this technique, there are also a couple of flaws.
- Preliminary preparation. Before starting the staining procedure, you will have to cut the required number of sheets of foil of the required size yourself.
- Lack of clarification control. Since the foil does not have a transparent structure, it is impossible to see the process of lightening the curls.
- The experience of a beginner master. The technique of highlighting under foil at home is not given immediately. It is best if the beginner master has at least a minimum internship.
- Material. Foil is often used not only for dyeing hair, but also for cooking. Accordingly, its consumption increases several times, and you constantly have to buy new rolls.
- Foil of different colors. Having mastered the technique of highlighting under foil, you can begin to study coloring. To do this, you will need to purchase multi-colored sheets of foil so that you can visually distinguish the color of the paints used. For example, under the yellow foil, curls are painted in a shade of blond, and inside the red foil, the hair becomes red.

Kinds
Foil highlighting is used in many color variations. And these are by no means the usual additions to the hairstyle. These techniques allow you to radically change the style and image.
- The classic technique. This method involves lightening strands of hair of the same thickness, taken at equal distances from each other. Basically, classic highlights are small feathers of bleached curls, located over the entire surface of the head.

- Straight-through technique. This method involves the use of contrasting shades from the natural hair color. Curls are dyed from the front of the head and on the crown.
- Veil technique. In this case, small strands of hair on the crown of the head are colored. It is this type of coloring that allows you to turn lifeless curls into a voluminous hairstyle.

- American technique. This method allows you to dye the strands and ends of the hair in any shades of red. It can be copper or red, the main thing is to get the effect of a rich overflow from the sun's rays.
- Ombre technique. This method allows you to create a smooth transition on the hair from dark saturated roots to light ends, which looks very impressive, stylish and fits any look.
- Blonding technique. The described method of dyeing hair requires sufficient knowledge from the master, so at home it is not worth undertaking the process of such lightening. When creating a hairstyle, you will need to apply four or five colors at the same time, each of which should be several tones lighter than the previous one. A well-done work will be expressed in the effect of overflow of strands in the sun.

Dyeing fixtures
First of all, you need to prepare the foil: it is cut into a large number of strips. Both specialized hairdressing foil and ordinary food foil are suitable. For coloring in several shades, several colors of the foil should be prepared so that there is no confusion during the coloring process. For classic highlighting, ordinary silver foil is suitable.
On one edge, each strip of foil must be folded with the matte side outward to create a "pocket" that will protect clothing and skin from paint wicking.
To calculate what the width of the stripes will be, you need to measure the width of the colored strand, multiply the result by 4, add 2 cm to the folds on the sides.
An integral attribute of highlighting is a brush with which the dye composition will be applied to the strands. The brush allows you to correctly and evenly distribute the dye through the hair.
Interesting fact: To prepare the coloring composition, you will need a ceramic or plastic bowl. To select the desired strands, you will need a brush with a long, thin tip.Gloves are required to protect your hands; for convenience, you can use thin latex gloves, which are sold in a pharmacy, or plastic ones. When dyeing both at home and in a hairdressing salon, for additional protection of clothing and skin, you must use a cape. Its fabric should not absorb paint.
To hold the foil on your hair, you will need metal hairpins or invisible hairpins.

Home highlighting techniques
Whichever method you choose, first test the purchased paint. If it turns out that it is causing an allergic reaction, replace the composition. To test, apply a small amount to the area behind your ear, wrist, or the crook of your elbow. There should be no rashes, spots, redness, peeling, itching at this place.
The minimum holding time is 20-30 minutes. Although, for a more reliable result, it is better to check the condition of the skin after 24 hours.
Any highlighting is done on clean hair. True, the opinions and advice of hairdressers in this regard differ. Some believe that the head should be washed on the day of staining, others recommend performing hygiene procedures 2-3 days before the scheduled event. In this case, a lot of sebum will not have time to accumulate on the hair, and the resulting thin film will not become an obstacle and will protect the curls from the effects of the chemical composition.
Highlight only dry strands.
Prepare strips of foil in advance. The width of each of them should be about 10 centimeters, the length - twice the curl plus 0.5-1 centimeter for the "pocket". Other calculations are possible, in which the ribbons are made 4 times wider than the strands, adding a couple of centimeters to the folds on the sides. If your hair is not very long, you can prepare 2 pieces of foil paper of the same width for each strand. Then their length should coincide with the length of the curls (taking into account the allowance for the bend from below).
Make small "pockets" on the strips that you will put under the strands. They will protect the scalp and root zone from paint flowing, and will allow you to maintain a small indent from the roots. To do this, fold the foil tape up to 1 centimeter at one end. Make the fold on the matte side. If you plan to simultaneously paint in different shades - take foil of several colors. If you dye curls from the roots, you can do without the "pockets".
Highlighting on short hair less than 10 centimeters long is usually done with a plastic cap. In this case, it is quite problematic to make yourself staining with foil at home, it is better to contact the master.

The traditional way. Correction
The classical technique is used for traditional, zonal, partial highlighting of medium and long hair. You just need to decide which strands and in what volume you will paint, especially if you plan to do it yourself. Here's what a universal painting method looks like in stages:
- Comb your hair thoroughly, divide it into 4-8 zones. Fix each with a hair clip.
- Prepare the brightening composition according to the instructions.
- Put on an old robe or cape. Protect hands with gloves.
- Start staining from the back of the head. Loosen one part of your hair, and use a ponytail comb to select thin strands for highlighting.
- Take one piece of foil paper. Apply a narrow strip of chemical composition to its matte part along its entire length, bypassing the "pocket".
- Place this piece of foil under the first strand so that the fold is under the roots.
- Moving from bottom to top, color the curl. Make sure that the dye does not get into the "pocket".
- Fold the strip in half, or place another piece of foil over the colored strand.
- Fold up the sides and secure the structure with a clamp.
- Follow the same steps with all the curls planned for coloring, first in the back of the head, then on the sides and on the crown. Bangs are the last.
- Withstand the time recommended by the chemical manufacturer.
- Do not remove all the foil at once, do it gradually. Unroll each strip gently and rinse the strand on it to prevent the rest of the hair from staining. Follow in the same sequence as you did the highlighting.
- Apply a balm or mask to your curls. Dry your head naturally.
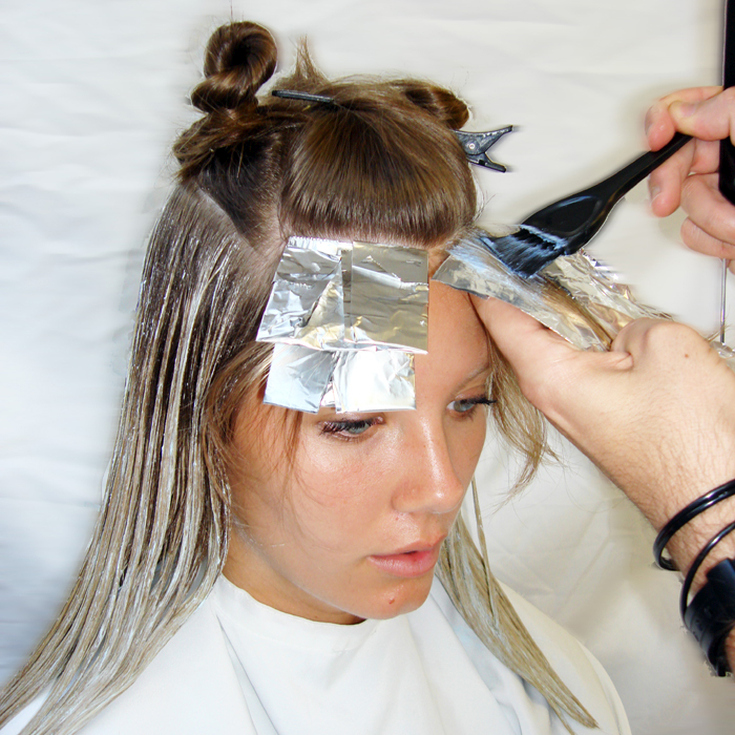
Attention! The procedure is simplified if you need to strip a separate area of the head or just a few curls. The sequence of actions and the algorithm in this case remain the same, but the time for staining is significantly reduced.
To re-highlight the hair on foil and tint the overgrown part of the curls, proceed as follows:
- separate the strand that needs correction;
- put a foil under it, having previously made a bend on the strip;
- dye your regrown hair;
- put another piece of foil on top;
- tuck the corners;
- do the same with the rest of the strands;
- withstand the required time, wash off the composition and apply a balm or mask to the hair.
- Preparation for correction is required the same as for highlighting.
Ombre style

How to correctly perform a simple ombre version:
- Make a criss-cross on the back of your head, which will divide your hair into 4 zones.
- Prepare your paint, put on gloves and a cape.
- Apply the lightener to your curls, from the middle to the ends.
- Wash off the composition after a maximum of 30 minutes.
- Wait until your hair is barely damp.
- Divide them horizontally into 2 parts.
- Lay one thin strand from the bottom area onto the foil strip.
- Color the lightened part, moving in the direction of hair growth.
- Place another piece of foil paper on top.
- In the same way, color the rest of the curls on the back of the head.
- Form 2 roughly equal pieces from the top zone.
- After stepping back a couple of centimeters from the temples, paint all the strands.
- Withstand the time specified in the instructions for the chemical agent.
- Wash your hair with shampoo, then apply a balm or mask.
Armor technique
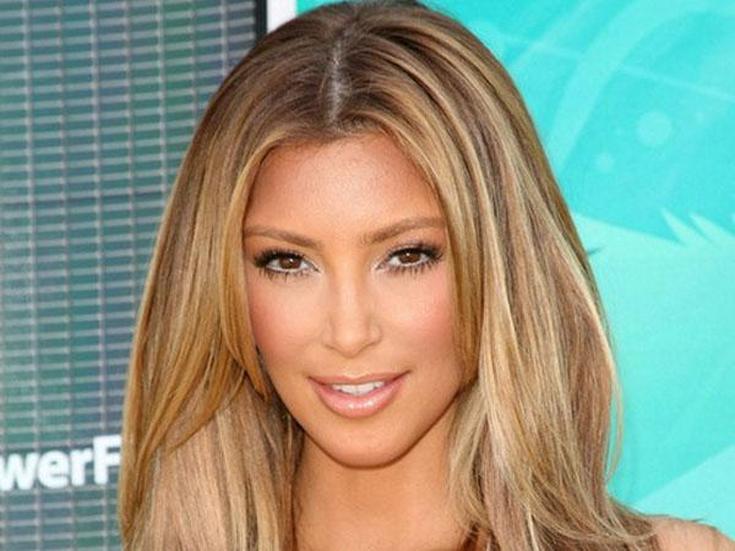
If you decide to book at home, stick to this algorithm:
- Prepare chemicals, put on a cape and gloves.
- Moisten your head, comb your hair well.
- Part it straight, separating the top.
- Form some narrow strands. To do this, use a comb with a ponytail to make zigzag parting, laying the pieces on 2 sides.
- Fix the parts above and below the comb separately.
- Place the first piece on a piece of foil.
- Color it, stepping back a few centimeters from the root zone. Apply more compound to the ends than to the entire length of the hair.
- When you reach the edges of the curls, roll up the foil.
- Apply light and dark color in turn.
- After processing all hair, leave it for the time specified in the instructions for the chemical composition.
- Remove the foil and rinse your head until the water is clear.
- Rinse your hair with shampoo, then use a balm / mask.
- Advice. Blondes may darken their original color before booking, although this is optional.
Balayage method
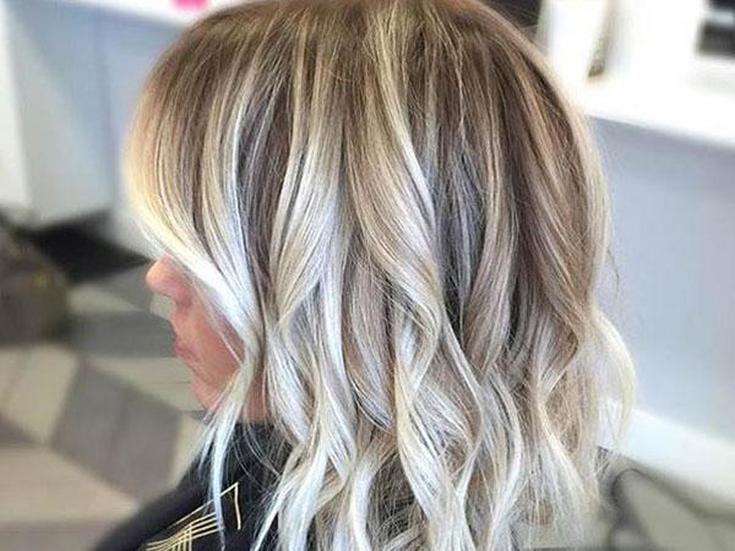
A step-by-step description of the steps in the procedure:
- Protect your clothing with an old robe, T-shirt, or cape.
- Comb through your hair thoroughly, highlighting the top area and securing it with bobby pins.
- Form strands 3–4 centimeters thick at the bottom. Tie each with an elastic band at the level above which you do not plan to dye your hair.
- Prepare the brightening agent according to the instructions.
- Distribute it along the ponytails without going behind the elastic bands.
- Massage your hair lightly so that the paint lies evenly.
- Wrap your hair in foil.
- Do the same with the rest of the hair.
- After 10-15 minutes, wash off the clarifier with warm water.
- Prepare the paint and apply it to the lightened part of the hair.
- Wrap the curls again with foil.
- After the allotted time, remove the strips, wash your hair with shampoo.
- Finish with a mask or balm.
- You can find out more about balayage and the rules for its implementation on our website.
American highlights

This foil technique is more like coloring and runs like this:
- Comb your hair.
- Select the lower and middle zones on the back of the head, pick up the rest of the hair with hairpins.
- Prepare the required number of formulations in different containers.
- Put on a robe and gloves.
- Color the bottom strands with the color you want to dominate your hair.
- Wrap them in foil of the same color.
- Do the same with the lower curls on the sides.
- Paint other strands from the same sides in different tones, alternating the compositions. Cover the finished curls with foil of other colors to know how the shades will be combined in the finished version.
- Move from the temples to the upper occipital region.
- Then paint the hair in the temporal zone, starting from the bottom.
- Make sure the shades are symmetrical on both sides of the head.
- Divide the remaining curls into 2 sections in the center.
- Continue staining along the bottom parting, then along the top, moving to the crown.
- Place the foil at an angle from your face.
- Take the time and start rinsing off the paint. First of all - with darker strands, at the end - with the lightest ones, so that the highlighting turns out to be even, not smeared.
Highlighting veil
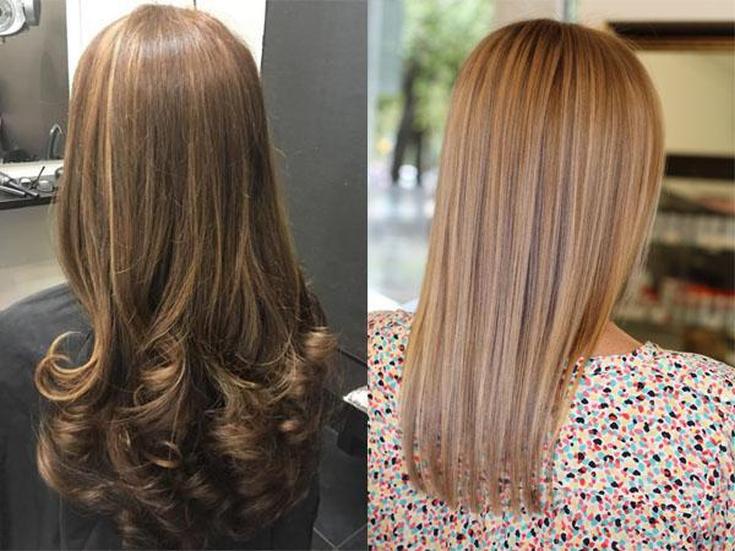
To properly veil:
- Divide your hair into 2 zones. You only need the top one, so pin the bottom one.
- Decide on the strands you want to dye. Select them using the zigzag or darning method (thinner parts are formed from a wide curl and recruited through one).
- The strands should be no wider than 3-4 millimeters. For convenience, you can immediately put them on pieces of foil.
- Wear a robe or waterproof cape and gloves.
- Dilute the brightening compound.
- Spread some of the product over the entire length of the foil strip.
- Place a strand formed from separate thin pieces on it.
- Color it.
- Lay another piece of foil on top (can be replaced with polyethylene).
- Fold up the edges of the strip. If necessary, secure the curl with a hair clip.
- Follow the same steps for the rest of your hair. Try not to take too long between the first and last strands.
- Withstand the time specified in the manufacturer's instructions.
- Remove the foil, rinse your hair with warm water.
An important point! Tint your curls if desired. If you do not take a sparing tint balm for this, but paint, postpone the procedure for several days. Let your hair rest after bleaching.
There are many options for highlighting with foil, but most of them are not easy to do at home. If you are determined to do the stain yourself, enlist the help of another person. Working together is more fun, faster and more productive.
For starters, do not tackle time-consuming techniques, try to strip individual strands.
Look at the ready-made schemes, photos of the step-by-step process, find hairdresser's master classes on the video. And only when you feel confident in your abilities, start experimenting with more complex techniques.
Follow-up care
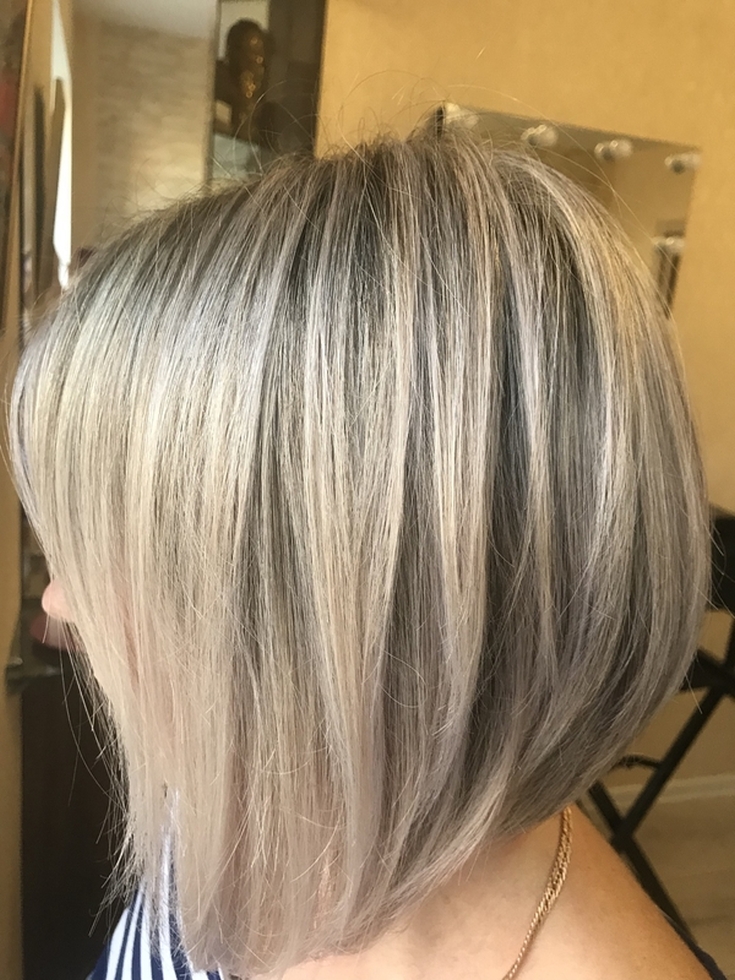
Say what you like, but even the safest hair dye negatively affects its structure. The highlighting technique is no exception, although it affects a small amount of curls. To bring hair in order after the dyeing procedure, to restore shine and density to it, you must follow some of the recommendations of hairdressers.
After the dyeing procedure, you need to treat the hair with a balm or make a mask. To do this, you can use a pre-purchased humidifier or use the conditioner that comes with each package with the dye composition.
It is necessary to purchase hair care and moisturizing products in advance. The main preference should be given to cosmetics marked for colored hair.
You should not do highlighting very often.There should be a certain period of time between the procedures, about 2 months. This time is quite enough for the hair to be filled with life after the initial dyeing. After the specified period, you can make a correction.
The use of various hair styling devices should be kept to the very minimum. Even frequent use of a regular hair dryer can have a detrimental effect on the condition of the hair. But if you cannot do without it, then it is better to dry the curls with a cold air stream in the direction of hair growth.
Beautiful examples
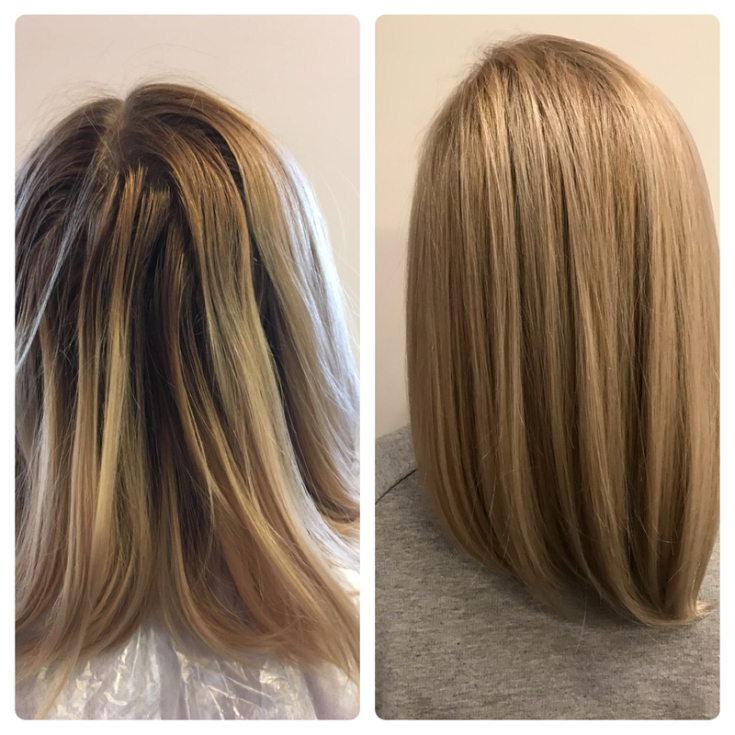
The most common highlighting option today is the balayage technique. And this is not surprising. The result exceeds all expectations. Hair has acquired airiness and lightness.
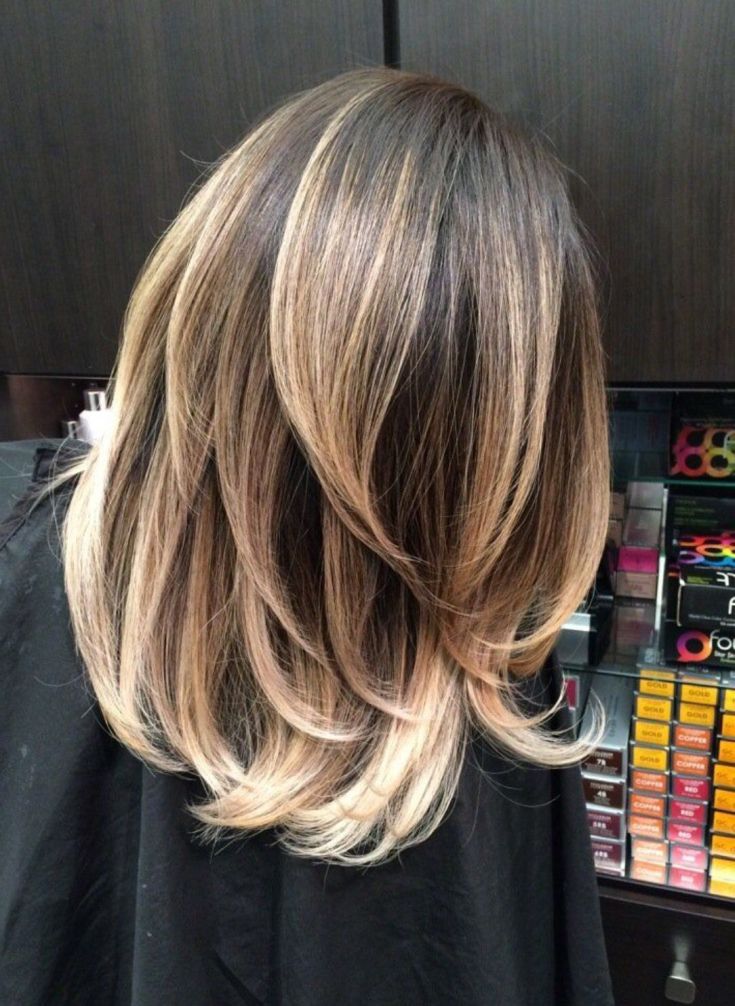
Ombre is an unusual and sophisticated way to highlight a woman's personality. With this selection of colors, the owner of the hair can call herself a vamp woman.

American highlighting technique in all its glory. At the sight of such beauty, the whole world turns over, and the admiring glances of others are directed at the owner of this hairstyle.
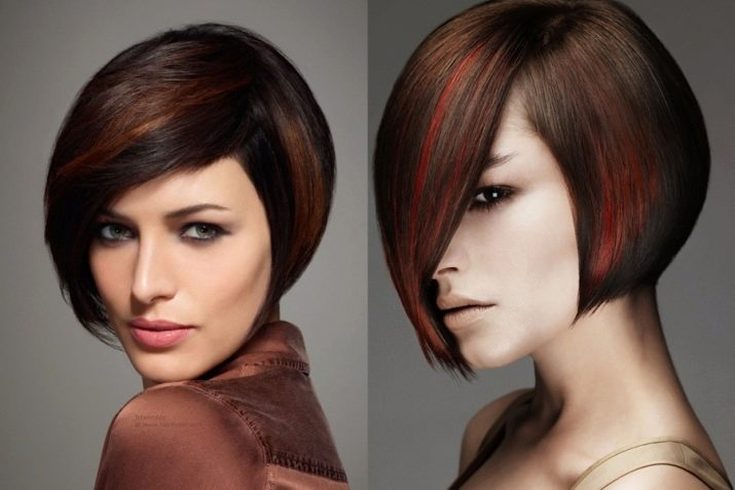
Foil is a handy tool, but, unfortunately, only in the hands of a professional. Before proceeding with complex techniques, try to lighten one strand in an invisible place. If you are satisfied with the result, experiment!
