- The essence of the method of curling hair on rags
- How to make curlers from rags
- The benefits of curling
- Flaws
- Step-by-step instruction
- Training
- The main stage
- Useful Tips
- The nuances of winding hair on rags
- Features of laying on rags
- What is required for curling
- How to wind short hair with rags
- How to curl your hair at night
- How to quickly wind your hair on rags in 5 minutes
- Means to consolidate the result
- What to use instead of rags
- Conclusion
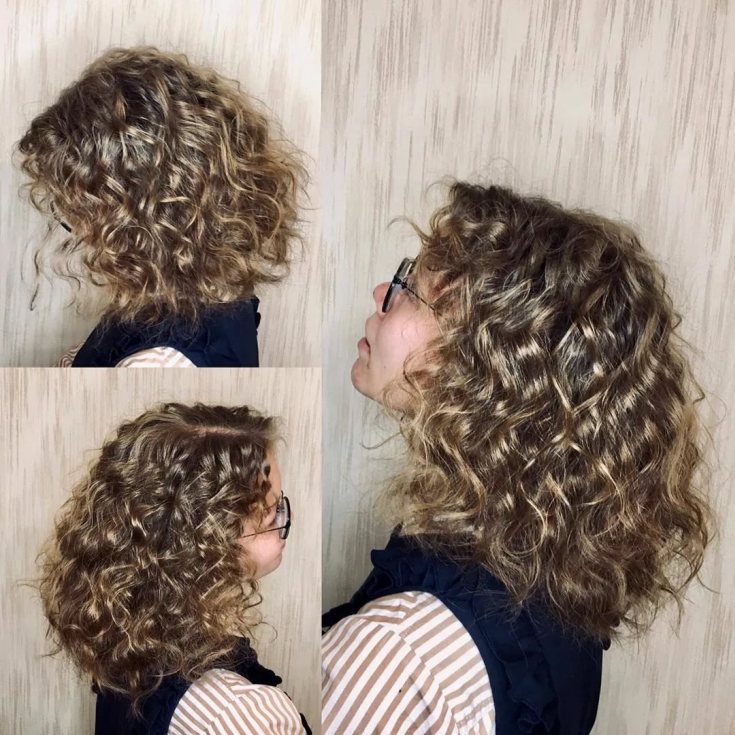
There are many ways to curl your hair. 👸🏻 You can also use cloths. 🎗 The procedure for curling with them 👧🏻 is very simple.


The essence of the method of curling hair on rags
You can make rags from any unnecessary material. This method is safe and effective.
The curling procedure should be carried out on the basis of the following recommendations:
- It is advisable to curl the hair at night. This is enough to dry the curls. On soft curlers and rest will be comfortable. If you wind up during the day, then the exposure time should be at least 4 hours.
- It is advisable to use a kerchief during the night procedure. This protects the strand from loosening and will help create original curls.
- If winding should be done in a short time, it is advisable to dry the damp curls with a hairdryer. Drying with a hair dryer has a negative effect on the hair.
- If the hair is very voluminous, then styling products are needed. Then they will last longer.
- Colored hair requires a special approach. Moisten them before curling.
- To make the hairstyle natural, strips of fabric of different sizes are prepared.

If you follow all these rules, you get a stylish hairstyle. With the help of rags, original styling is obtained for festive and everyday occasions.
How to make curlers from rags
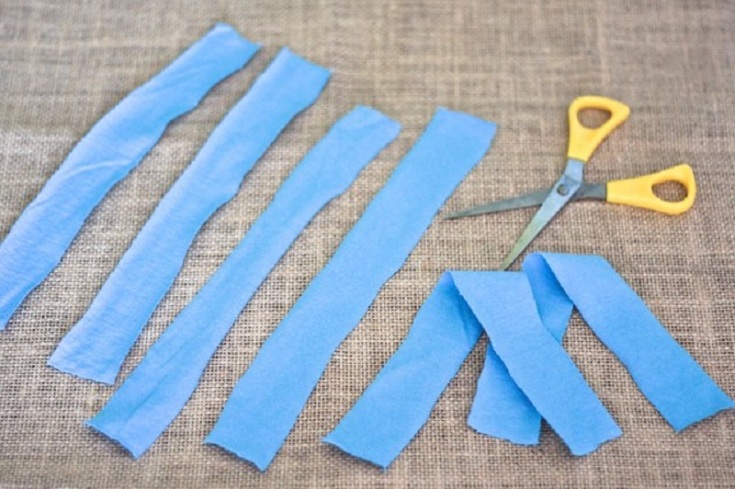
To make these curlers, you need scissors, chalk, a ruler and cotton material. Blanks perform like this:
- A piece of material should be prepared. It is advisable to use a larger cut, since a small one may not be enough.
- You need to outline the fabric to get the same blanks. It is better to take a width of 5-6 cm and a length of 15-20 cm.
- The material is cut along the indicated boundaries.

This completes the production of rags. Gauze, bandage or tape can be used as home curlers. With any of these materials, you will be able to make an original hairstyle.
The benefits of curling
Safety. Perhaps this is the main advantage of this curling method in comparison with other options. Since the thermal effect on the strands is completely excluded, and hence their damage.
Simplicity and convenience. Anyone can cope with such a procedure, while in order to learn how to curl their hair with a special curling iron, some will take a long time. In addition, even the laziest can curl strands with rags, just curl your hair and go to bed. At night you will feel absolutely no discomfort, but in the morning you will wake up with a luxurious hairdo.
Profitability. You don't have to spend money on modern stylers. Everything you need will be at hand at home. In this case, you can use curling rags several times. It turns out to be very profitable.
Decent result. This is exactly the case when the minimum cost of the procedure does not mean a bad result at all. With experience, or even the first time, you will get curls that look just as good as curls made using other methods.
Even if you have rather thick and unruly hair, with the help of such a curling you will definitely be able to "tame" it.

Flaws
- Everything has two sides, and curling on rags also has its drawbacks, despite the large number of advantages. The main disadvantage is the length of the procedure. You will need time not only to wind all your hair, but also to fix it.
- That is why many girls usually wind the strands for the night, because future curls will need at least 4-5 hours (without outside influence) to fix. While using a curling iron or iron, curls are created in a matter of minutes.
- However, it is worth remembering that such a long process guarantees a long-term result.
- There is an opinion that curls after curling with rags last about the same as these same rags were in your hair. Therefore, do not rush to remove the tapes as soon as you wake up, if this is not necessary.

Step-by-step instruction
Training
First of all, you need to start creating "curlers". To do this, prepare scissors and a small piece of fabric. It is better to use cotton, calico or other natural materials. If you don't have textiles at hand, do not be upset. You can replace the fabric with regular gauze, bandages, or even paper towels. Cut the fabric into strips of approximately the same size. The number and parameters of the bands directly depend on the length and thickness of the hair, as well as the desired result.
To create large curls, the strips of fabric should be wide. Accordingly, to create small curls, the ribbons should be thinner and there will be more of them.
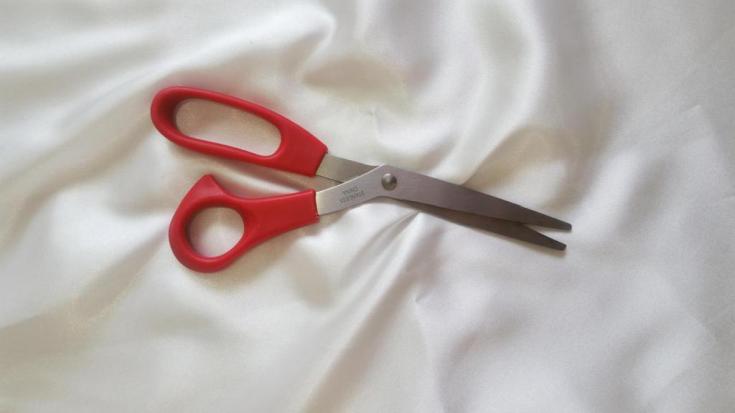
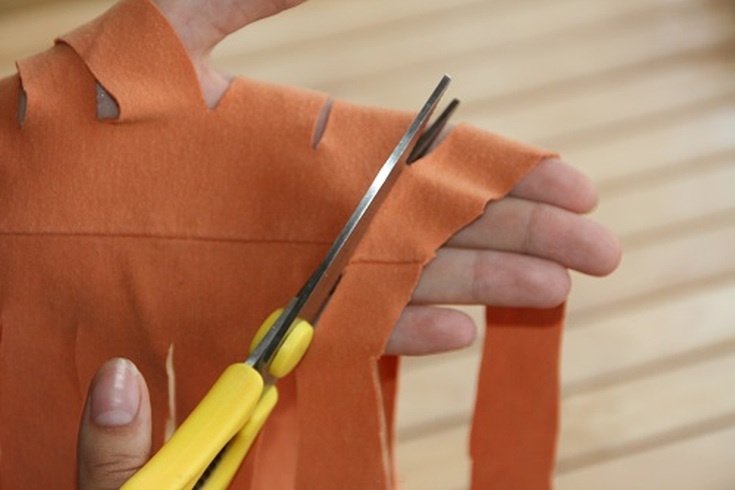
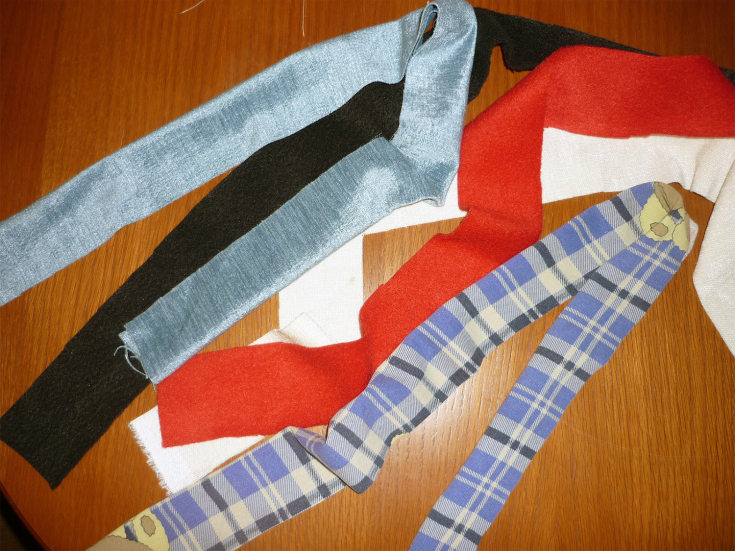
Now you need to properly prepare your hair. Wash your hair thoroughly, lightly dry your hair with a towel, but do not rub your hair so as not to break its structure. Then dry the strands with a hair dryer using a gentle mode.
It is important to leave your hair slightly damp without drying completely.
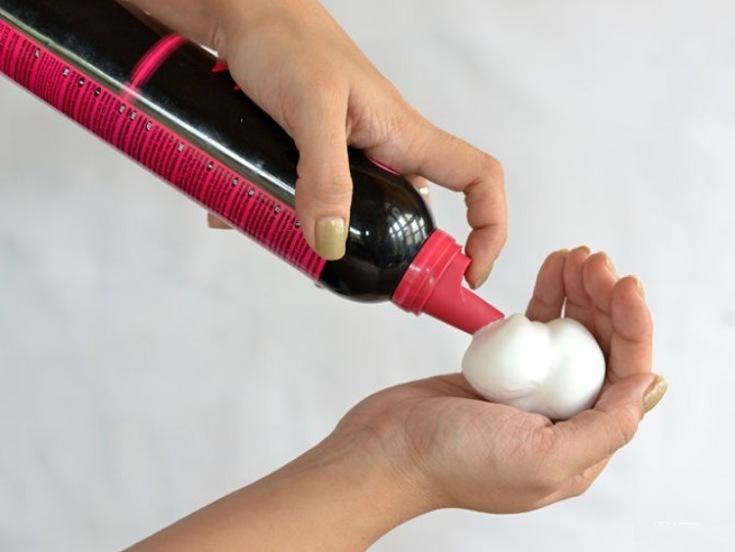
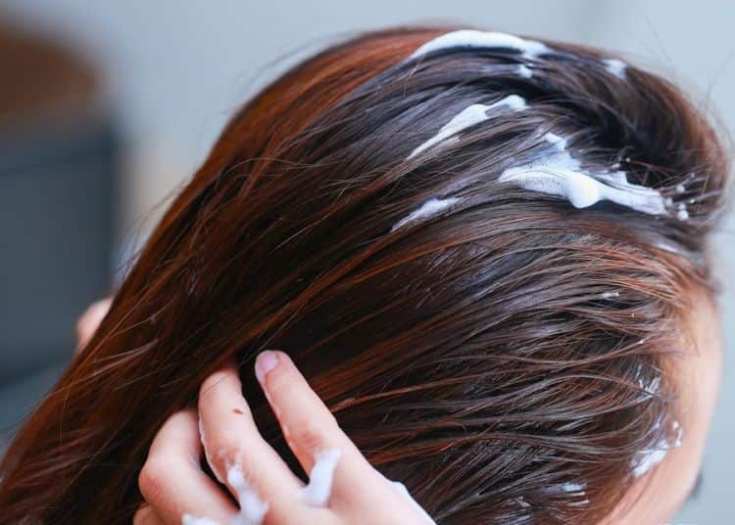
Then apply a light fixer to the strands. It can be any of your favorite spray, mousse, or gel. If your hair is not prone to oily, you can additionally apply a small amount of foam to the root zone to create volume. Keep your hair only slightly damp.
If they are too wet, they simply won't have time to dry out overnight, and you won't get a luxurious hairstyle. If the strands are too dry, then the curl will not work out strong and elastic.


The main stage
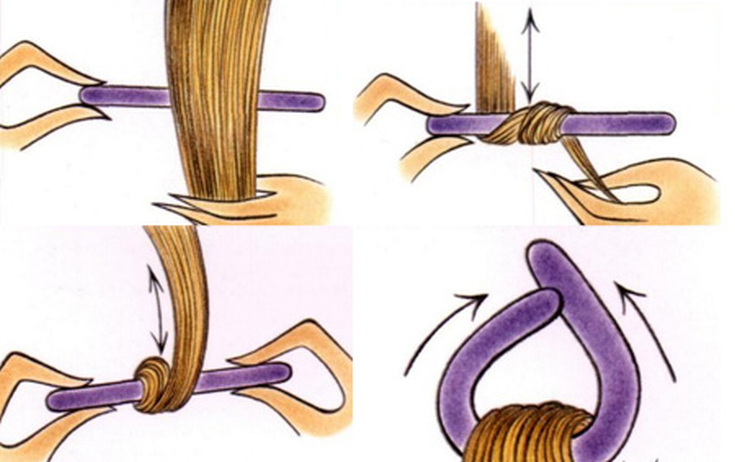
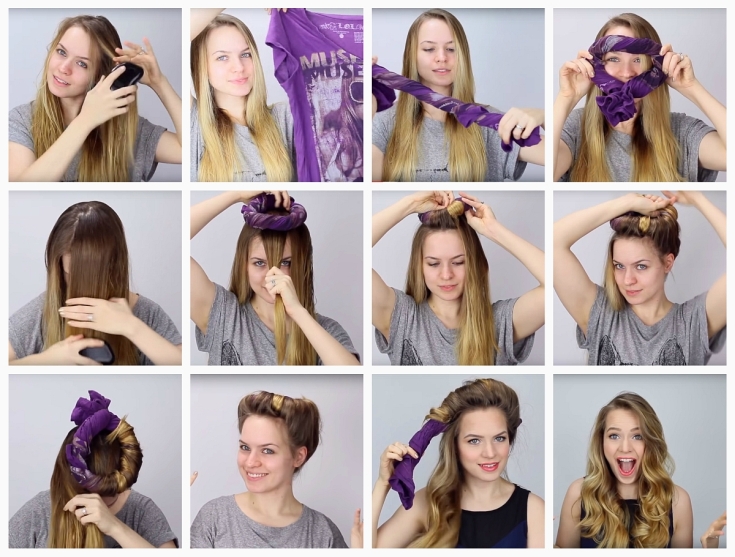
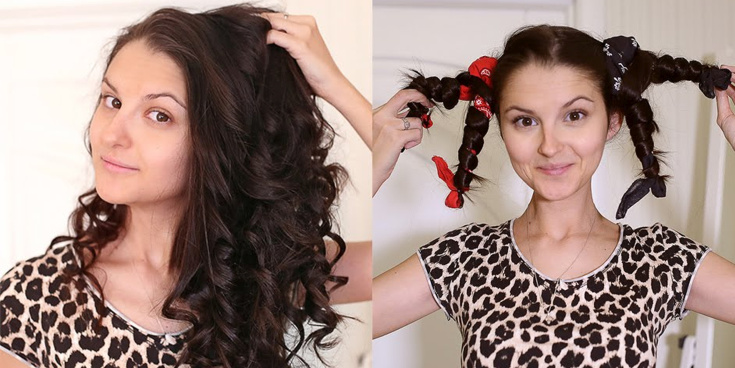
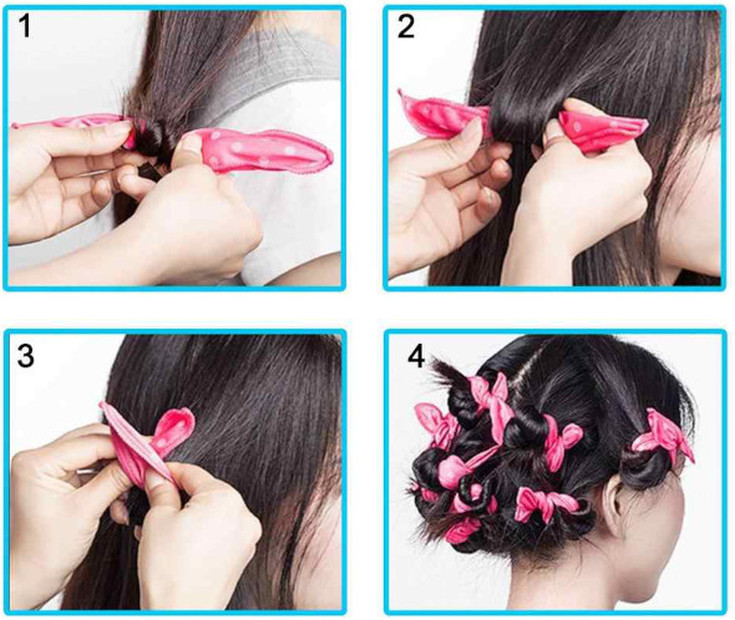
The process of creating curls is pretty simple. All hair must be divided into strands. The smaller the strand, the thinner the curl will be. Place the end of the strand in the middle of the rag ribbon and start curling. You can wind curls from the very roots, or you can bring them to the middle or even lower. It all depends on whether your hair is short or long. And also on what kind of styling you plan to do. Then just tie the ends of the ribbons.
Make sure the knot is tight enough not to come loose while you sleep. But do not forget that in the morning it will have to be removed somehow.
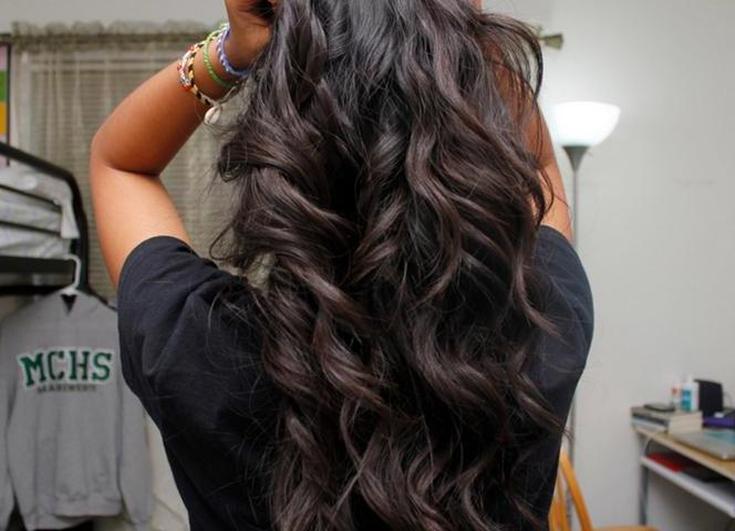
In this way, it is necessary to wind up all the strands in stages. Then cover your head with a handkerchief or scarf. This will make it easier for you to sleep, and the rags will definitely not come loose. In the morning, just gently remove all the rags, fluff up the hair with your hands and fix the curls with varnish. Such curls will definitely hold out until the next shampooing.
The styling looks great both loose and in the hair. You can style your hair in a high or low ponytail, make a voluminous bun, etc. You can also decorate your hair with various accessories and hairpins, depending on your mood and overall image.
Useful Tips
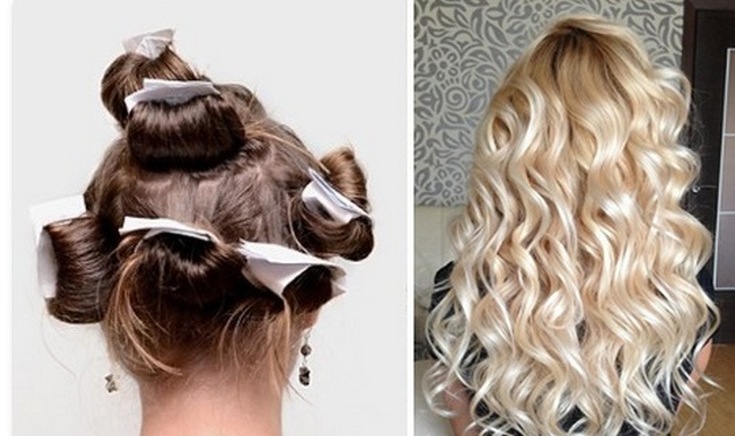
- If you want to achieve the most natural curling possible, you can wrap the strands on rags of different widths. This trick allows you to create curls that look as if nature gave them to you.
- Use a styling product that is right for your hair type. If you have thin and rare strands, you should definitely not choose heavy gels and waxes for fixing.So you only run the risk of getting greasy, unkempt hair, completely devoid of volume.
- To create large curls, cloth rags should be not only wide, but also quite dense. You can even use plain paper.
- In the process of winding the strands, make sure that the curls are located in the direction away from the face. Otherwise, the hairstyle will not look very pretty.
- If you want to fix the styling, but there was no varnish at hand, use folk remedies. For example, a solution based on water and sugar. They can be sprayed on curls both before and after curling.
- If your hair is completely dry before curling, you can moisten it with water from a conventional spray bottle.
- Use the tips listed above, don't be afraid to experiment with looks and be beautiful.
The nuances of winding hair on rags
In order for the curls to turn out beautiful and last as long as possible, you should listen to useful advice.
Here are some of them:
- It is best to curl your hair at night. This time will be quite enough for the strands to become dry. In addition, it is quite comfortable to sleep on soft rag curlers, winding will not cause you any inconvenience.
- If circumstances do not allow you to wind up at night, consider the minimum holding time of rags on your head, equal to 4 hours.
- When curling your hair on rags at night, it is better to use a kerchief. This will save your strands from unraveling and allow you to get beautiful curls.
- If winding up needs to be done in a very short period of time, it is better to dry the damp hair with a hairdryer. Blow-drying, in turn, will negatively affect the health of your hair.
- If your hair is too voluminous and thick enough, be sure to use special styling products. At the same time, the strands will turn out to be more voluminous and will last longer.
- A special approach is needed for colored hair. Since these hairs are quite vulnerable, you should wet them with water before curling.
- For a more natural look, prepare strips of fabric in different sizes.
Features of laying on rags
Curls on rags are a great idea for those who want to curl but don't have any special devices at hand. Before the implementation of the task, it is necessary to prepare for the corresponding process.
How to properly wind your hair on rags? The following features are worth remembering related process:
- Hair must be thoroughly washed before styling. Dirty strands do not curl well.
- Drying your hair completely is not recommended. To keep the hairstyle well, it is enough just to lightly dry the hair with a towel.
- It is recommended to use a high hold styling spray and styling foam for greater durability. You can also use mousse or curling wax to make your curls lush and lighter.
- When making curls on rags, be sure to comb your hair.
- If you want to achieve the desired result as soon as possible, you should use a hairdryer. But in this case, it is recommended to apply thermal protection to the hair.
What is required for curling
How to wind your hair with rags? This is a very simple process that even a child can handle. For him you need to prepare:
- comb;
- hairdryer (if desired);
- thermal protection (if a hair dryer will be used to dry hair);
- styling gel (foam, mousse or wax);
- curler cloths;
- invisible hairpins (if desired);
- spray-fixer for hair of high resistance.
Nothing else is required. If your hair is short, you can enlist the support of friends or loved ones. With their help, styling will be faster and better.
How to wind short hair with rags
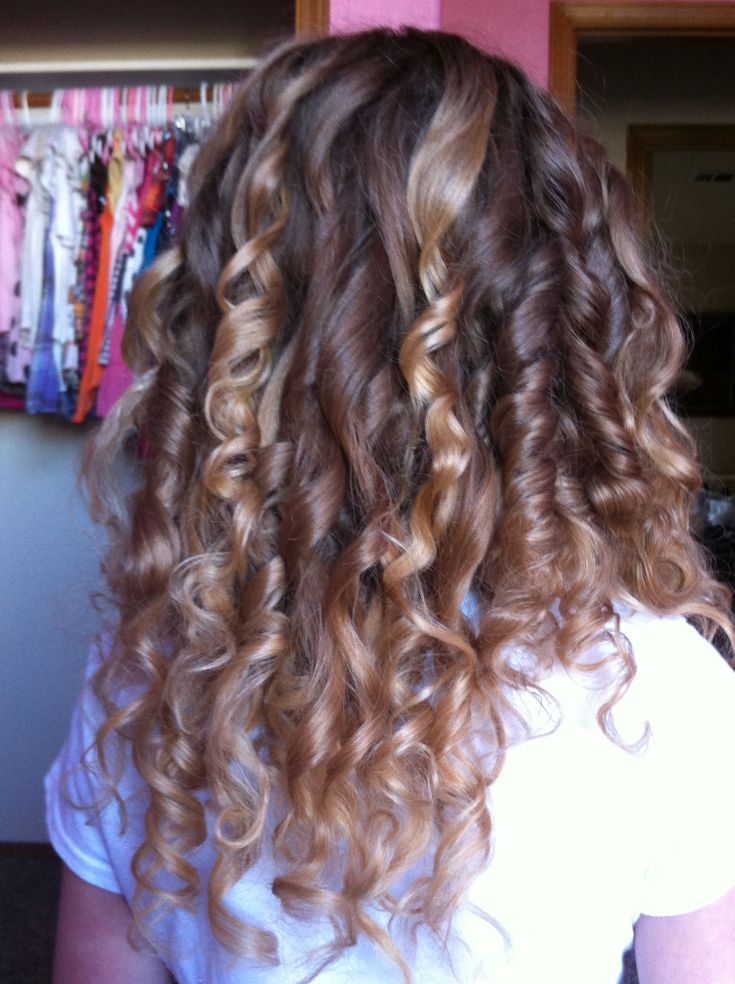
With a short hair length, use a large number of rags to make the strands thin. To create curls, you need to choose a cotton fabric without protruding threads so that in the morning you do not have to waste time removing them from your hair.

The process of creating a hairstyle is as follows:
- First you need to rinse your hair with shampoo. Apply balm for 3 minutes. Rinse thoroughly.
- Dry with a towel. Lubricate with mousse designed to create curls. Smooth styling mousse won't keep the curls in shape.
- Separate the hair zone where the length makes it possible to wind them.
- If a haircut with a short nape is done, then you need to wind it from the bangs. Then go to the parietal zone and go down below, grabbing the remaining strands available for curling.
- Twist the hair over the cloths by twisting it 90 °.
- Tie the edges of the fabric with a knot.
- Spray the curls with fixing spray. Leave on for 6-7 hours. To keep the hairstyle longer, it is recommended to keep the rags overnight.
- Loose curls gently. Move slowly so that your hair does not get tangled. Spread the curls with your fingers.
How to curl your hair at night
You can wind up on rags at night not only with straight hair, but also naughty and curly by nature. It is enough to lay them once, and the curls will look well-groomed and tidy until the next shampooing.
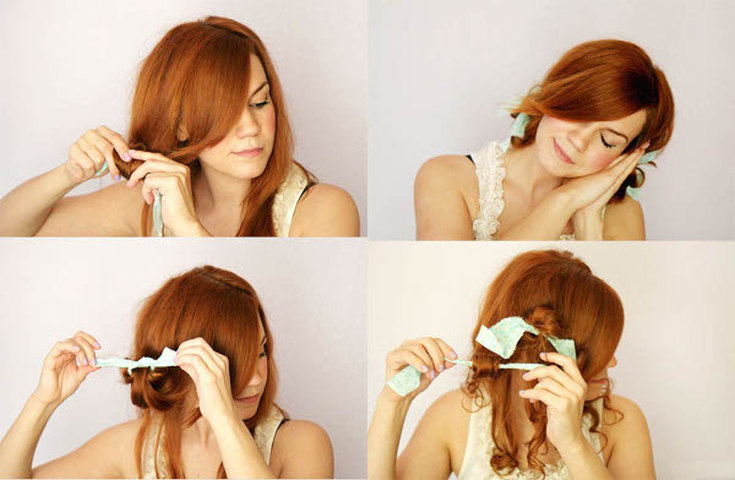
To get beautiful curls, you need to prepare:
- kerchief;
- a piece of cloth;
- comb;
- scissors;
- mousse;
- hairpins;
- Polish for hair.
The styling product is chosen based on the type of hair. For thin and sparse strands, do not use heavy gel or wax for fixing. Hair will become greasy, unkempt and lack volume.
The process of doing the work is roughly the following:
- First, you need to cut a piece of fabric into strips measuring 6x15 cm.For large curls, the cloths are chosen from dense material and cut at least 10 cm wide.
- Rinse hair thoroughly. Dry slightly.
- Apply mousse. Better to use a means of weak fixation. You can also use varnish or folk remedies: sweet, alcohol solution or beer.
- Brush hair. Distribute into parts.
- Pin up excess strands with invisible hairpins or hairpins so that they do not get confused, and it would be easier to make curls out of them.
- Tie the end of the strand with a knot together with a fabric strip.
- Gradually curl the strand from the end to the roots of the hair. The thinner the curl, the more spectacular the hairstyle will look and last longer.
- You can twist strands inside and outside, to the roots or to the middle, tying a knot at the end. The hairstyles will be different in each case. It is impossible to tighten the knots tightly, otherwise a trace will be noticeable on the curls.
- When all the hair is curled up, tie a scarf around your head. The thermal environment will enhance the effect and make the curls more resistant. You need to use a scarf from a thin material so that the curls have time to dry out overnight.
- Remove the cloths in the morning when the hair is completely dry. Neatly untied scraps of fabric may be reapplied.
- Spread the curls with your fingers. To make the styling last longer, sprinkle strong hold with varnish. Spray from a distance of 30 cm. An elastic and medium hold spray may be used for slightly curled hairstyles.
- On normal and dry hair, it is allowed to additionally apply a foam to the area near the roots to add volume.
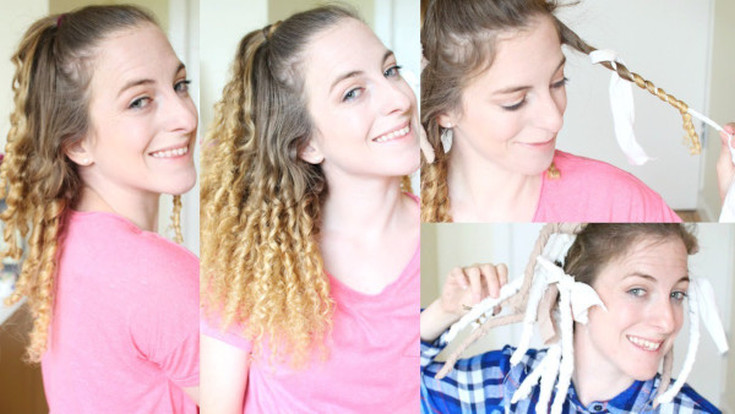
How to quickly wind your hair on rags in 5 minutes
You can wind your hair with volume from the roots or tie a tail at the crown, and wind small strands on rags. In order not to spend all night on creating a hairstyle, you can use a hairdryer to speed up the process.
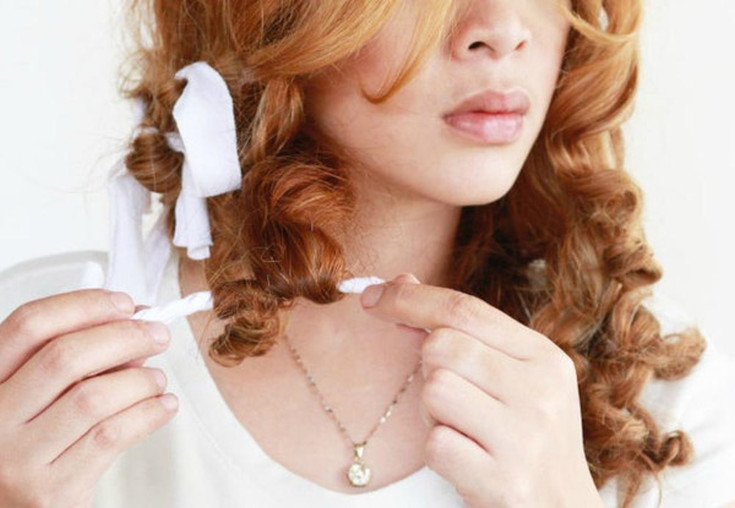
For work you will need:
- piece of cloth;
- varnish;
- scissors;
- hairdryer;
- gel.
The fabric for curling is chosen from cotton, which does not fade, otherwise, together with the styling, the strands will be dyed in an undesirable color of dye on the fabric itself.
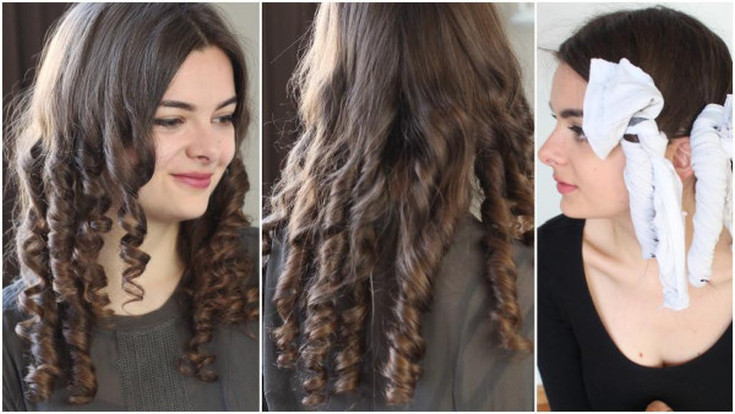
The process looks like this step by step:
- First, you need to cut a piece of fabric into strips measuring 10x15 cm.
- Then rinse your hair with shampoo, since curls are obtained only on clean hair.
- Then you need to use a balm that moisturizes and protects against damage.
- If the hair is dry, then lubricate it with a nourishing mask. In other cases, this step must be skipped, otherwise the hair will become heavier and more difficult to curl.
- Dry with a towel, but do not rub, so as not to break the structure. Comb with a comb.
- To create root volume, apply a medium hold gel.
- Distribute hair into medium-sized strands.
- Fix the edge of the strand in the center of the fabric. Tighten to the required height. It is necessary to wind the strands tightly, otherwise the finished hair will stick out untidy.
- Tie the fabric in a knot. Twisting the curls in different directions creates a tousled, trendy look. You can wind the curls up to half. Then the roots will have no volume, and the ends will curl beautifully.
- Repeat the process with the remaining hair. The durability of the styling will increase if the strands are made thin.
- Dry with a hairdryer.
- After the curls have cooled completely, undo the knots on the patches. Unfold the strands gently.
- Separate the curls with your hands. The comb will ruin your hair. Sprinkle with varnish. The styling looks good in a loose state.
- To create the effect of wet hair, instead of varnish, apply a strong hold gel to the curls.
Means to consolidate the result
To fix the result on the strands fixing agents are applied:
Curl cream helps the hairstyle to keep its shape, gives the curls elasticity and shine. Apply to dry or damp hair.
Curl Gel released in the form of jelly or aerosol. When applied correctly, curls stay in shape all day. Apply to clean, slightly dried hair. The gel fixes perfectly, therefore, after removing the rags, there is no need to use other means.
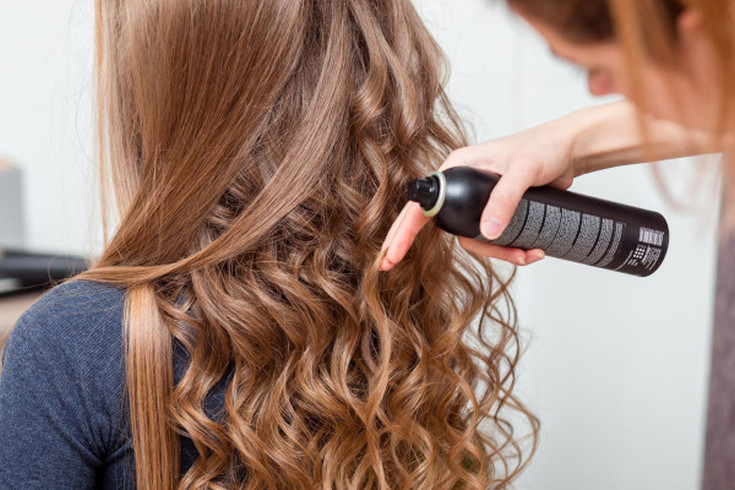
Fixation balm curls makes hair soft and manageable. After applying the product, the strands are easy to fit. Helps to shape hair by eliminating frizz. Hair treated with balm, after being rolled on rags, takes the form of elastic curls.
Fixing fluid should be applied to slightly damp hair before winding it around with rags. Possesses a strong degree of fixation. Helps to increase volume at the roots and strengthen hair. Valid for 48 hours. Doesn't make the hairstyle heavier.

Curl mousse gives volume and the desired shape. It is necessary to use a small amount of funds so that the hairstyle does not become tough, and the curls do not stick together. Apply to moisturized strands. The type of mousse depends on the length of the hair, the longer they are, the lower the level of fixation you need to use.
Curling spray hair makes curls soft, shiny, flexible and elastic. Provides a secure fit. Suitable for fine hair.
Varnish - this is the final touch for creating a hairstyle. Used to add volume and keep curls. It is allowed to apply only to dried strands. To prevent hair from sticking together, spray at a distance of 20-30 cm.
The composition of cosmetics contains harsh chemicals that negatively affect the hair, making it dull, dry, and split ends.

Homemade recipes help restore the structure of curls and achieve savings:
- Lemon will replace varnish. Insist juice squeezed from 1/4 of the fruit. Combine 2 drops of alcohol with 2 drops of water, combine with juice. Pour into a spray bottle.
- 20 g of leaves of Bearberry are poured with 0.5 l of water. Cook on the minimum burner setting until 1/2 of the liquid has evaporated. Only warm broth is used for styling.
- Flax seeds saturate the hair with vitamin E. To prepare the broth, mix 230 ml of boiling water and 20 g of seeds. Insist 2-4 hours. Use instead of varnish.
- Add 15 ml of apple cider vinegar to 1.5 liters of water. Use instead of rinse aid. The hair is dried, then wrapped on rags.
- Beer is diluted with water in a 2: 1 ratio. Use instead of a spray.
- 10 g of sugar is combined with 200 ml of water and 20 ml of alcohol. Apply instead of a spray.
What to use instead of rags
If there is no textile, then the fabric is allowed to be replaced:
- bandage;
- gauze;
- paper napkins;
- paper;
- packaging film;
- cocktail tubes.
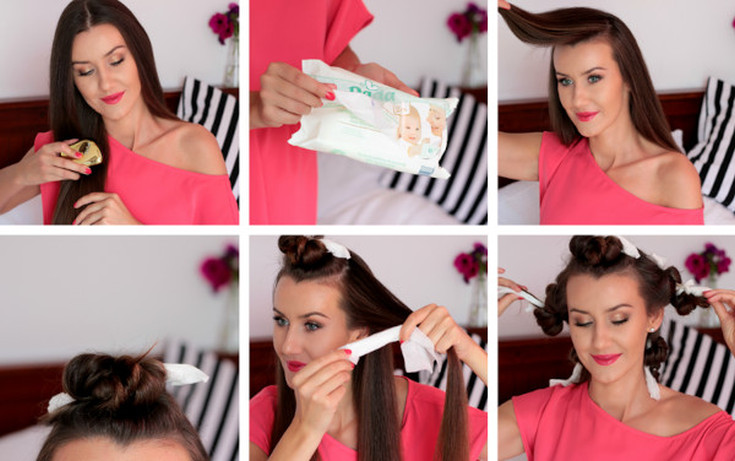
The process of curling on paper is roughly the following:
- Cut a sheet of paper 7-8 cm wide.
- Roll up the blanks with tubes.
- Place tissue patches inside, the length of which should be slightly longer than the paper tubes. The protruding part of the fabric will be needed to fix the curl.
- Divide hair into strands. Curl each on paper. Tighten to the required height.
- Tie the protruding parts of the fabric into knots.
- Leave on for 5 hours.
- Remove the papers, fix the curls with varnish.
If there is no desire or time to cut the rags, you can replace them with wet wipes. The principle of creating a hairstyle in this case does not differ from curling with rag patches.
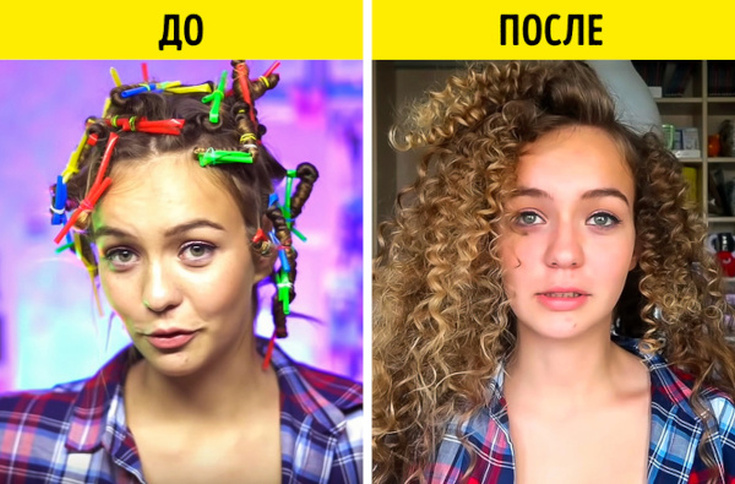
To wind your hair on cocktail tubes, you need:
- Apply mousse to the entire length of the hair.
- Wind on a cocktail tube, holding the strand by the tip.
- Remove the straw from the center of the curl while holding the curl. Fasten in a cruciform position with invisible ones.
- Dry with a hair dryer and remove invisibility. Strengthen with varnish.


Conclusion
To wind up a child's hair without tears, to increase perseverance, you can use bright colored rags, which will turn creating a hairstyle into an exciting game.
